部署基于DCGM的Prometheus+Grafana的监控系统
请注意,本文编写于 49 天前,最后修改于 5 天前,其中某些信息可能已经过时。
目录
部署基于DCGM的Prometheus+Grafana的监控系统
部署方案
N台GPU服务器用于指标采集,一台纯CPU服务器用于配置 Prometheus+Grafana 进行监控
| 组件 | 版本 | 用途 | 端口 |
|---|---|---|---|
| DCGM | 4.x (cuda12版本) | NVIDIA数据中心GPU管理器 | 本地socket |
| Node Exporter | v1.7.0 | 系统级指标采集(CPU/内存/磁盘) | 59100 |
| Go | v1.24.0 | 编译DCGM Exporter依赖 | - |
| DCGM Exporter | v4.4.2-4.7.1 | GPU指标暴露(Prometheus格式) | 59400 |
| Prometheus | v2.51.2 | 时序数据存储与告警计算 | 9090 |
| Grafana | latest stable | 可视化仪表盘 | 3000 |
| Alertmanager | v0.30.1 | 告警路由与管理 | 9093 |
| DingTalk Webhook | v2.1.0 | 钉钉告警通知 | 8060 |
部署后目录文件
GPU服务器
展开代码/opt/
├── dcgm-exporter/       # DCGM Exporter配置
│   └── cfg.yml          # Basic Auth配置
└── node_exporter/       # Node Exporter配置
    └── cfg.yml          # Basic Auth配置
Prometheus服务器
展开代码/opt/
├── prometheus/           # Prometheus主程序及配置
│   ├── sd-cfg.yml       # 服务发现配置
│   ├── alert.yml        # 告警规则
│   └── data/            # TSDB数据存储
├── alertmanager/         # Alertmanager程序及配置
│   ├── alertmanager.yml # 主配置(路由+接收器)
│   └── data/            # 告警状态存储
└── dingtalk/            # 钉钉插件
    ├── config.yml       # Webhook配置
    └── contrib/templates/legacy/template.tmpl  # 消息模板
告警规则
| 序号 | 告警名称 | 判定表达式 (PromQL) | 阈值 | 持续时长 | 严重度 | 触发含义 |
|---|---|---|---|---|---|---|
| 1 | GpuExporterDown | up{sd_job="dcgm_exporter"} == 0 | 0 | 1m | critical | DCGM-Exporter 服务宕机或 GPU 不可见 |
| 2 | GpuCountReduced | count by (instance) (DCGM_FI_DEV_GPU_UTIL) < on(instance) (count by (instance) (DCGM_FI_DEV_GPU_UTIL offset 1h)) | 相比1h前减少 | 5m | critical | 相比1小时前 GPU 数量减少 |
| 3 | GpuTemperatureHigh | DCGM_FI_DEV_GPU_TEMP > 80 | > 80 | 2m | critical | GPU 核心温度过高 |
| 4 | GpuMemoryTempHigh | DCGM_FI_DEV_MEMORY_TEMP > 95 | > 95 | 2m | warning | GPU 显存温度过高 |
| 5 | HighGpuUtilization | DCGM_FI_DEV_GPU_UTIL > 90 | > 90% | 5m | info | GPU 核心利用率持续过高 |
| 6 | GpuMemoryUsageHigh | DCGM_FI_DEV_FB_USED / 49152 > 0.85 | > 90% | 5m | info | GPU 显存使用率过高 |
| 7 | GpuMemBandwidthHigh | DCGM_FI_DEV_MEM_COPY_UTIL > 90 | > 90% | 5m | warning | GPU 显存带宽利用率持续过高 |
| 8 | GpuPowerNearLimit | DCGM_FI_DEV_POWER_USAGE / 300 > 0.95 | > 95% TDP | 3m | warning | GPU 功耗接近 TDP 限制 |
| 9 | GpuEccSbeHigh | rate(DCGM_FI_DEV_ECC_SBE_VOL_TOTAL[1h]) > 0 | > 0 | 0m | warning | 单比特 ECC 错误增加 |
| 10 | GpuEccDbeCritical | DCGM_FI_DEV_ECC_DBE_VOL_TOTAL > 0 | > 0 | 0m | critical | 双比特 ECC 错误 |
| 11 | GpuRowRemapFailure | DCGM_FI_DEV_ROW_REMAP_FAILURE > 0 | > 0 | 0m | critical | 显存行重映射失败 |
| 12 | GpuPciReplayHigh | rate(DCGM_FI_DEV_PCIE_REPLAY_COUNTER[5m]) > 10 | > 10/s | 5m | warning | PCIe 重传次数过高 |
| 13 | NodeOomKill | increase(node_vmstat_oom_kill[5m]) > 0 | > 0 | 0m | critical | 系统触发 OOM Kill |
| 14 | NodeCpuStealHigh | rate(node_cpu_seconds_total{mode="steal"}[5m]) > 0.1 | > 10% | 5m | warning | CPU Steal 时间过高 |
| 15 | NodeMemoryPressure | node_memory_MemAvailable_bytes / node_memory_MemTotal_bytes < 0.05 | < 5% | 2m | warning | 系统可用内存过低 |
| 16 | NodeLoadHigh | node_load1 / count(node_cpu_seconds_total{mode="idle"}) without (cpu,mode) > 2 | > 2x | 5m | info | 节点负载过高 |
| 17 | NodeDiskFull | node_filesystem_avail_bytes{mountpoint="/"} / node_filesystem_size_bytes{mountpoint="/"} < 0.1 | < 10% | 5m | warning | 根分区磁盘空间不足 |
部署步骤
1. 安装DCGM工具
展开代码wget https://developer.download.nvidia.com/compute/cuda/repos/ubuntu2204/x86_64/cuda-keyring_1.0-1_all.deb
sudo dpkg -i cuda-keyring_1.0-1_all.deb
sudo add-apt-repository "deb https://developer.download.nvidia.com/compute/cuda/repos/ubuntu2204/x86_64/ /"
sudo apt-get update -y
sudo apt-get install -y datacenter-gpu-manager
# 安装 DCGM-4 库、服务与推荐包(一次搞定 libdcgm.so.4 和 systemd 单元)
sudo apt install -y --install-recommends datacenter-gpu-manager-4-cuda12
sudo systemctl start nvidia-dcgm && sudo systemctl enable nvidia-dcgm
rm cuda-keyring_1.0-1_all.deb
验证:
展开代码ldconfig -p | grep libdcgm
sudo systemctl status nvidia-dcgm

2. 装 Node Exporter(系统指标)
展开代码wget -q https://github.com/prometheus/node_exporter/releases/download/v1.7.0/node_exporter-1.7.0.linux-amd64.tar.gz
tar -xzf node_exporter-1.7.0.linux-amd64.tar.gz
sudo mv node_exporter-1.7.0.linux-amd64/node_exporter /usr/local/bin/
rm -rf node_exporter-1.7.0*
# 生成 bcrypt 哈希
sudo apt install apache2-utils
htpasswd -nBC 10 "" | tr -d ':\n'    # 需要输入两遍密码
# 设置访问限制
sudo mkdir /opt/node_exporter
cd /opt/node_exporter
sudo tee ./cfg.yml << 'EOF'
basic_auth_users:
  prometheus: <bcrypt哈希值>   # 账号: 密码哈希值
EOF
# 起 systemd 服务
sudo tee /etc/systemd/system/node_exporter.service <<'EOF'
[Unit]
Description=Node Exporter
After=network.target
[Service]
User=root
ExecStart=/usr/local/bin/node_exporter \
          --web.listen-address=:59100 \
          --collector.cpu --collector.meminfo --collector.diskstats \
          --collector.filesystem --collector.systemd \
          --web.config.file /opt/node_exporter/cfg.yml
Restart=always
[Install]
WantedBy=multi-user.target
EOF
# 重新加载服务并设置开机自启
sudo systemctl daemon-reload
sudo systemctl enable --now node_exporter
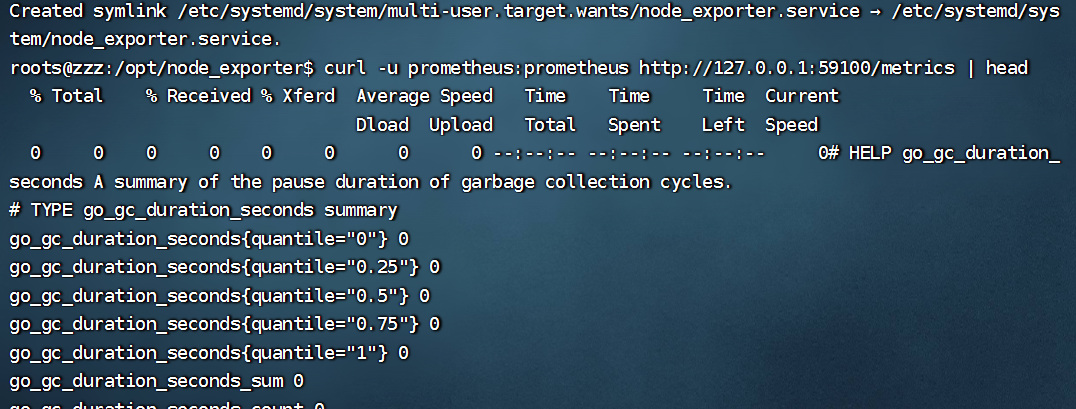
验证
展开代码curl -u 账号:密码 http://127.0.0.1:59100/metrics | head
3. 装 go 工具
展开代码cd ~
wget https://go.dev/dl/go1.24.0.linux-amd64.tar.gz
sudo tar -C /usr/local -xzf go1.24.0.linux-amd64.tar.gz
echo 'export PATH=/usr/local/go/bin:$PATH' | sudo tee /etc/profile.d/go.sh
source /etc/profile.d/go.sh
rm go1.24.0.linux-amd64.tar.gz
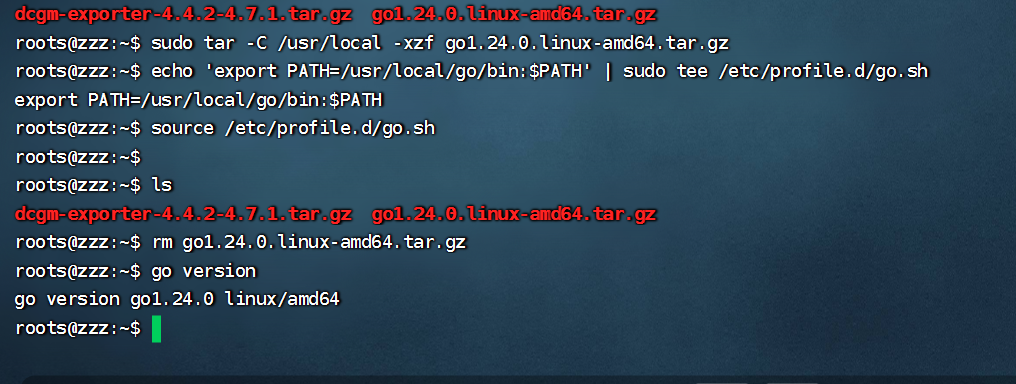
验证
展开代码go version
4. 装 DCGM Exporter(GPU 指标)
展开代码wget https://github.com/NVIDIA/dcgm-exporter/archive/refs/tags/4.4.2-4.7.1.tar.gz
tar -xzf dcgm-exporter-4.4.2-4.7.1.tar.gz
cd dcgm-exporter-4.4.2-4.7.1
sed -i 's/^go 1.24.0/go 1.20/' go.mod
sed -i '/^toolchain/d' go.mod
# 设置国内代理
go env -w GOPROXY=https://goproxy.cn,direct
# 禁止 go 自动去下新版 toolchain
go env -w GOTOOLCHAIN=local
go mod tidy
make binary
# 给 sudo 继承当前 PATH,并一次性把国内代理带过去
sudo env "PATH=$PATH" \
     GOPROXY=https://goproxy.cn,direct \
     make install
# 设置访问限制
sudo mkdir /opt/dcgm-exporter
sudo tee /opt/dcgm-exporter/cfg.yml << 'EOF'
basic_auth_users:
  prometheus: <bcrypt哈希值>   # 账号: 密码哈希值
EOF
# 起 systemd 服务
sudo tee /etc/systemd/system/dcgm-exporter.service <<'EOF'
[Unit]
Description=DCGM Exporter
After=nvidia-dcgm.service
Wants=nvidia-dcgm.service

[Service]
User=root
ExecStart=/usr/bin/dcgm-exporter \
          -a ":59400" \
          --web-config-file /opt/dcgm-exporter/cfg.yml
Restart=always
RestartSec=5

[Install]
WantedBy=multi-user.target
EOF
# 重新加载服务并设置开机自启
sudo systemctl daemon-reload
sudo systemctl enable --now dcgm-exporter
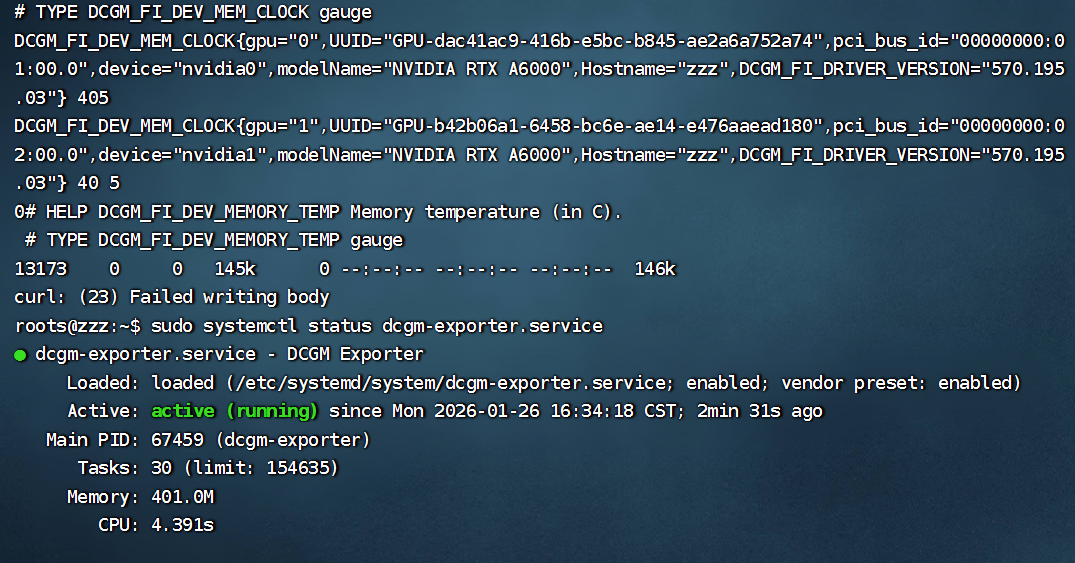
验证
展开代码sudo systemctl status dcgm-exporter
curl -u 账号:密码 http://127.0.0.1:59400/metrics | head
5. http 自动发现主机信息
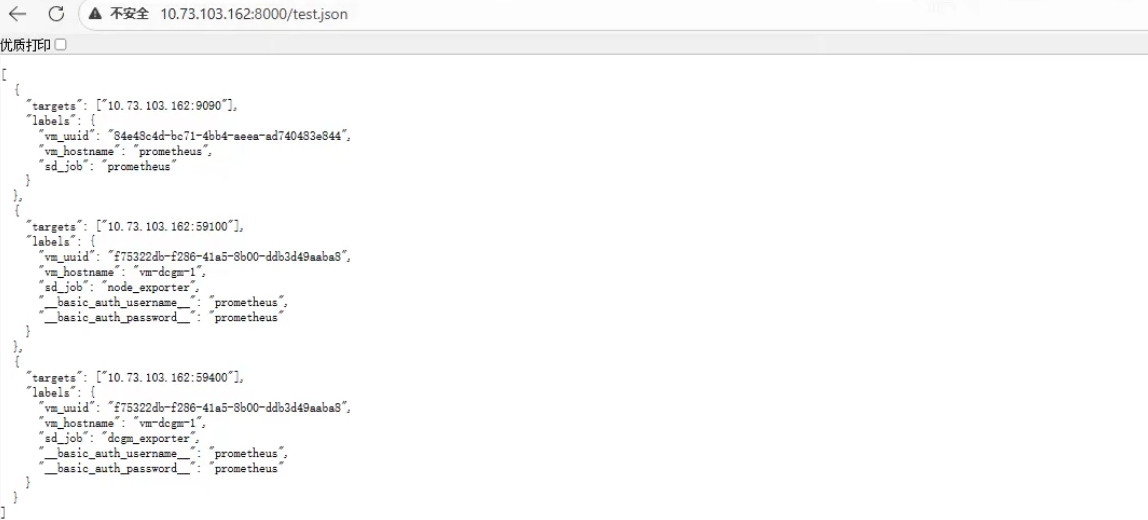
展开代码sudo mkdir /opt/metrics
sudo tee /opt/metrics/test.json << 'EOF'
[
  {
    "targets": ["10.73.103.162:9090"],
    "labels": {
      "vm_uuid": "84e48c4d-bc71-4bb4-aeea-ad740483e844",
      "vm_hostname": "prometheus",
      "sd_job": "prometheus"
    }
  },
  {
    "targets": ["10.73.103.162:59100"],
    "labels": {
      "vm_uuid": "f75322db-f286-41a5-8b00-ddb3d49aaba8",
      "vm_hostname": "vm-dcgm-1",
      "sd_job": "node_exporter",
      "__basic_auth_username__": "prometheus",
      "__basic_auth_password__": "prometheus"
    }
  },
  {
    "targets": ["10.73.103.162:59400"],
    "labels": {
      "vm_uuid": "f75322db-f286-41a5-8b00-ddb3d49aaba8",
      "vm_hostname": "vm-dcgm-1",
      "sd_job": "dcgm_exporter",
      "__basic_auth_username__": "prometheus",  # 对应被监听端的账号
      "__basic_auth_password__": "prometheus"  # 对应被监听端的密码
    }
  }
]
EOF
# 临时起http服务
cd /opt/metrics
python3 -m http.server 8000 --bind 0.0.0.0 &
验证
浏览器访问http://:8000/
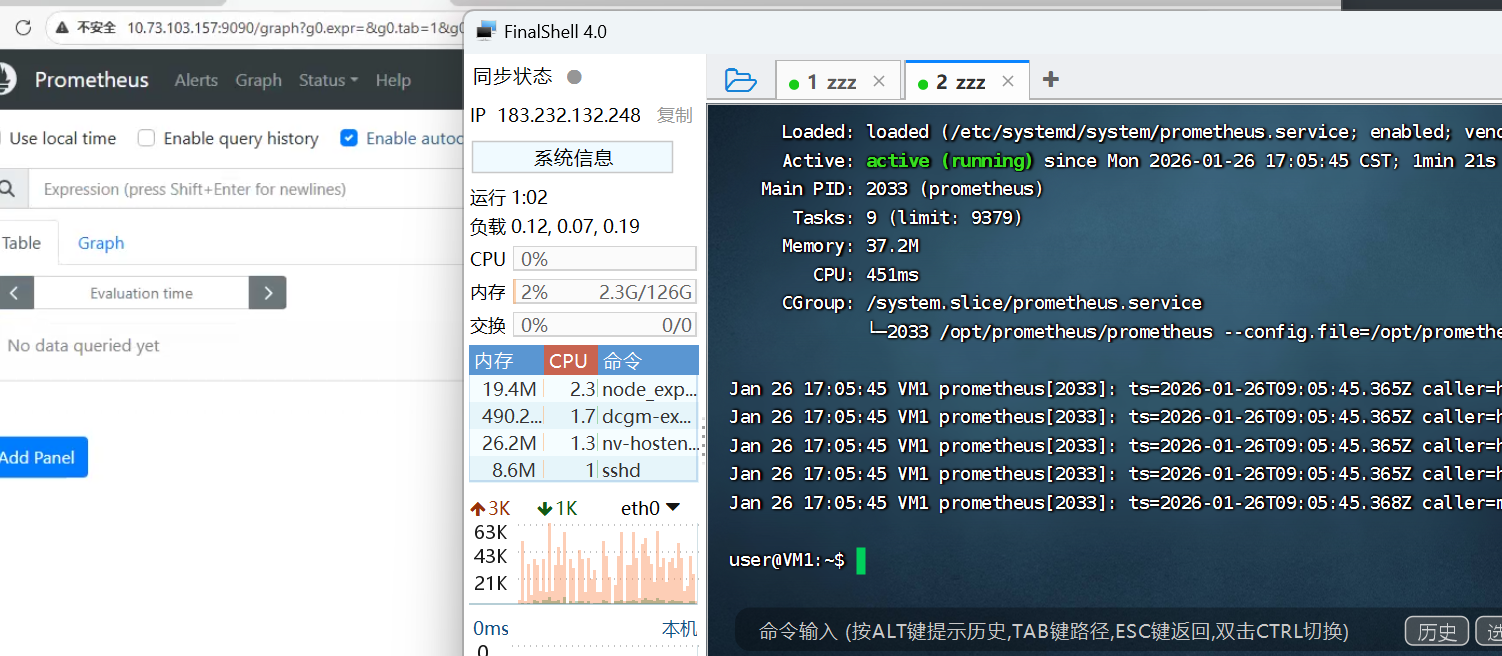
6. 装 Prometheus 监控
展开代码PROM_VER=2.51.2
wget -q https://github.com/prometheus/prometheus/releases/download/v${PROM_VER}/prometheus-${PROM_VER}.linux-amd64.tar.gz
tar -xzf prometheus-${PROM_VER}.linux-amd64.tar.gz
sudo mv prometheus-${PROM_VER}.linux-amd64 /opt/prometheus
rm -f prometheus-*.tar.gz
# 写 http 自动发现模板
sudo tee /opt/prometheus/sd-cfg.yml <<'EOF'
global:
  scrape_interval: 5s

scrape_configs:
  - job_name: "from service discovery"
    http_sd_configs:
      - url: "http://10.73.103.162:8000/test.json"
    basic_auth:
      username: prometheus
      password: prometheus

    relabel_configs:
      - source_labels: ["__meta_vm_uuid"]
        target_label: rb_instance

      - source_labels: [__meta_vm_hostname]
        target_label: instance_name

      - source_labels: [__meta_sd_job]
        target_label: rb_job

EOF
# systemd 启动
sudo tee /etc/systemd/system/prometheus.service << 'EOF'
[Unit]
Description=Prometheus
After=network.target
[Service]
User=user
ExecStart=/opt/prometheus/prometheus \
          --config.file=/opt/prometheus/sd-cfg.yml \
          --storage.tsdb.path=/opt/prometheus/data \
          --web.enable-lifecycle
Restart=always
[Install]
WantedBy=multi-user.target
EOF
# 重新加载服务并设置开机自启
sudo systemctl daemon-reload
sudo systemctl enable --now prometheus
验证
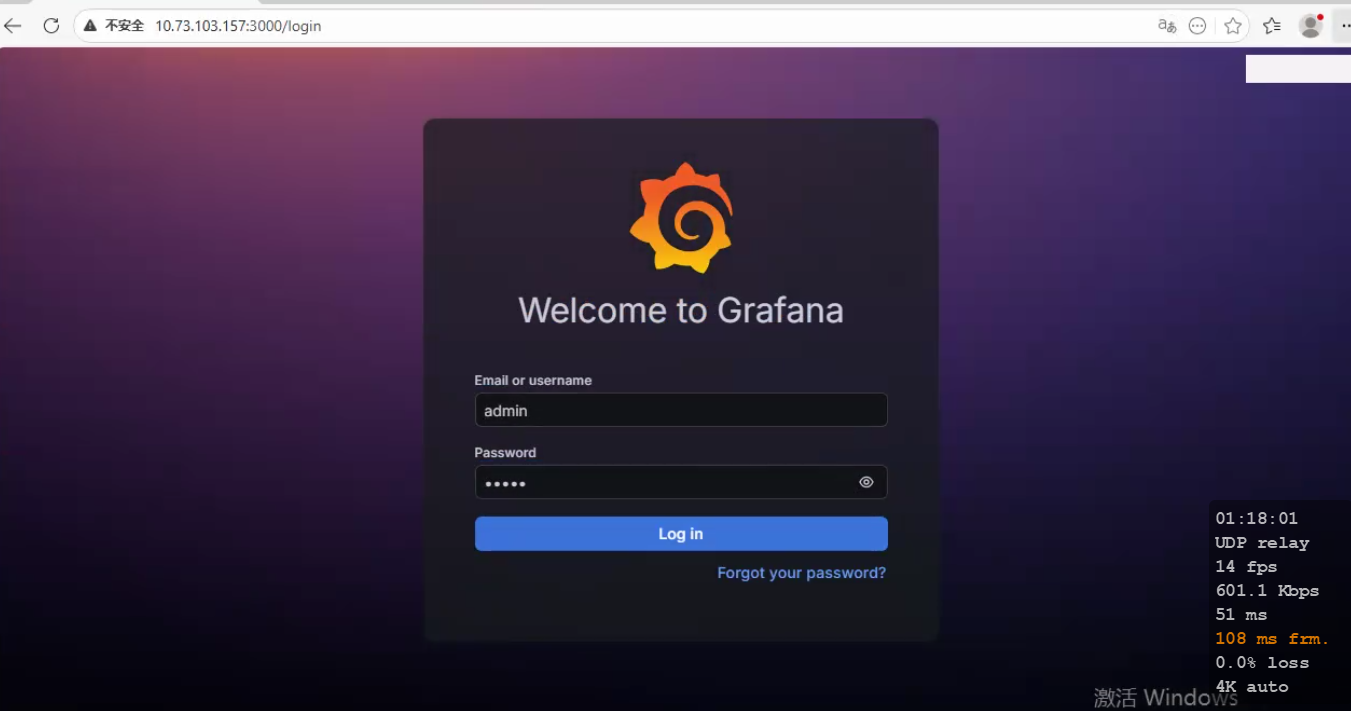
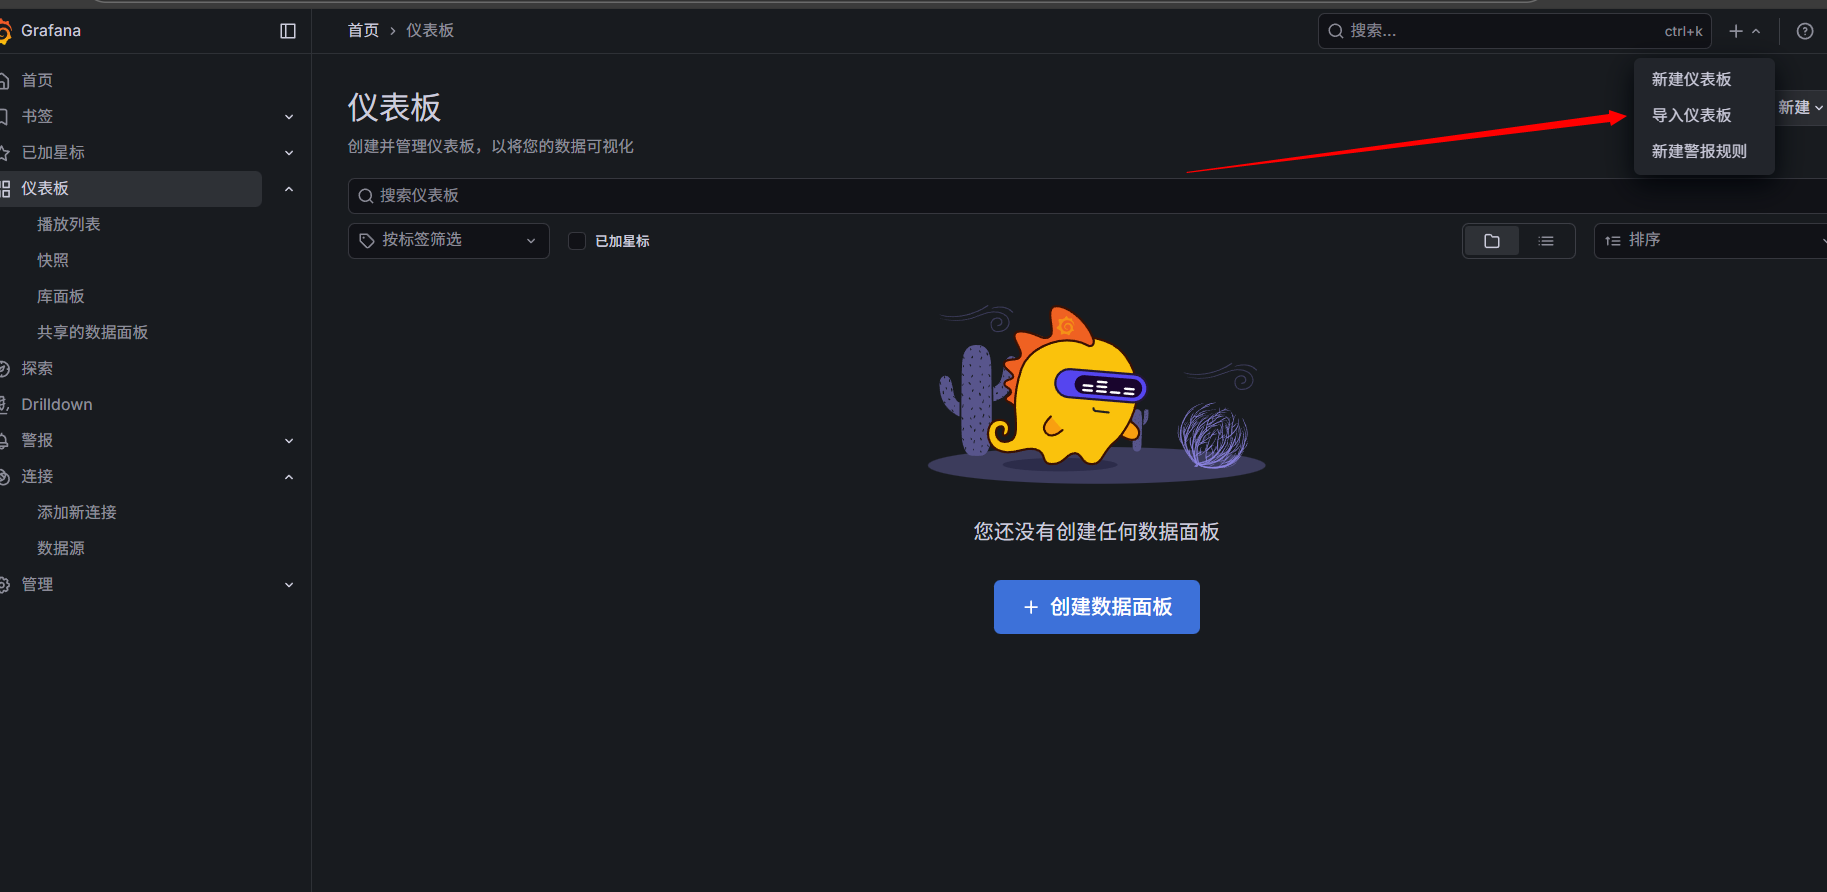
7. Grafana 展示(12239 1860)
展开代码# 安装依赖
sudo apt-get install -y apt-transport-https software-properties-common wget
# 添加官方 GPG 密钥
sudo mkdir -p /etc/apt/keyrings/
wget -q -O - https://apt.grafana.com/gpg.key | gpg --dearmor | sudo tee /etc/apt/keyrings/grafana.gpg > /dev/null
# 添加稳定版源(**不要同时加 beta 和 stable**,会冲突)
echo "deb [signed-by=/etc/apt/keyrings/grafana.gpg] https://apt.grafana.com stable main" | sudo tee /etc/apt/sources.list.d/grafana.list
# 更新并安装 Grafana(开源版)
sudo apt-get update
sudo apt install -y grafana
sudo systemctl enable --now grafana-server
# 浏览器  http://<host>:3000  默认 admin/admin
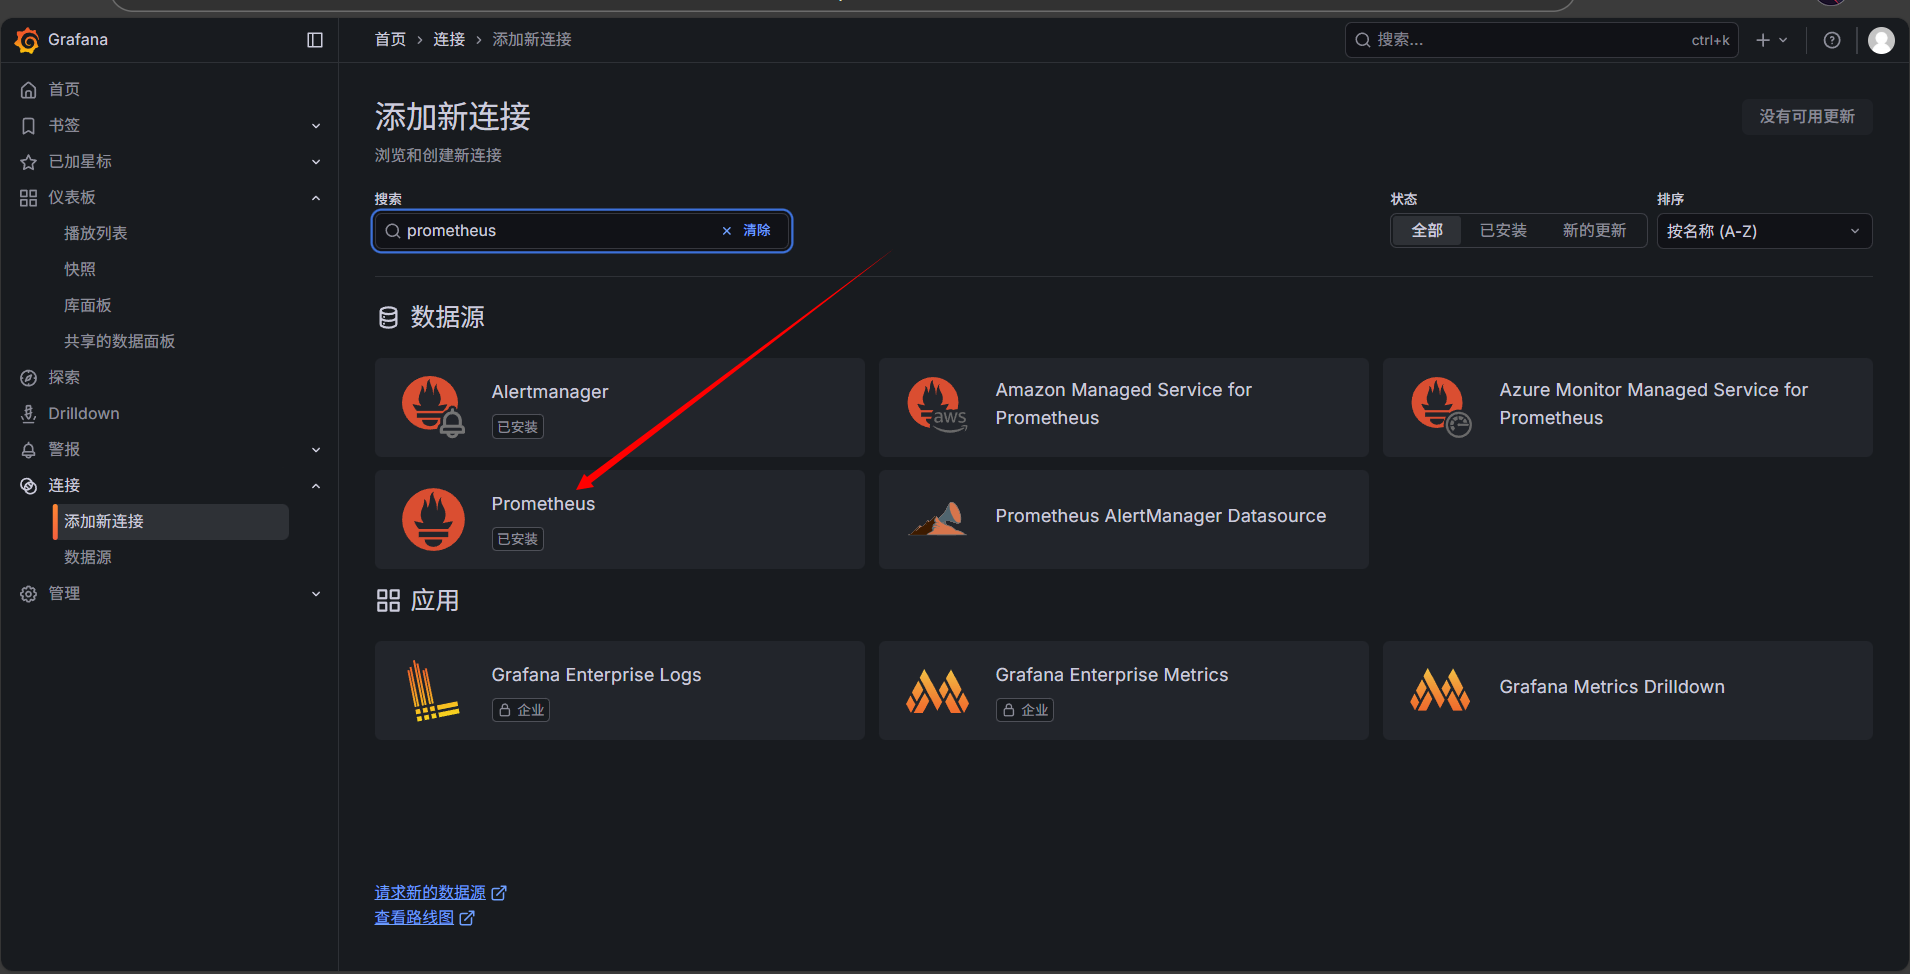
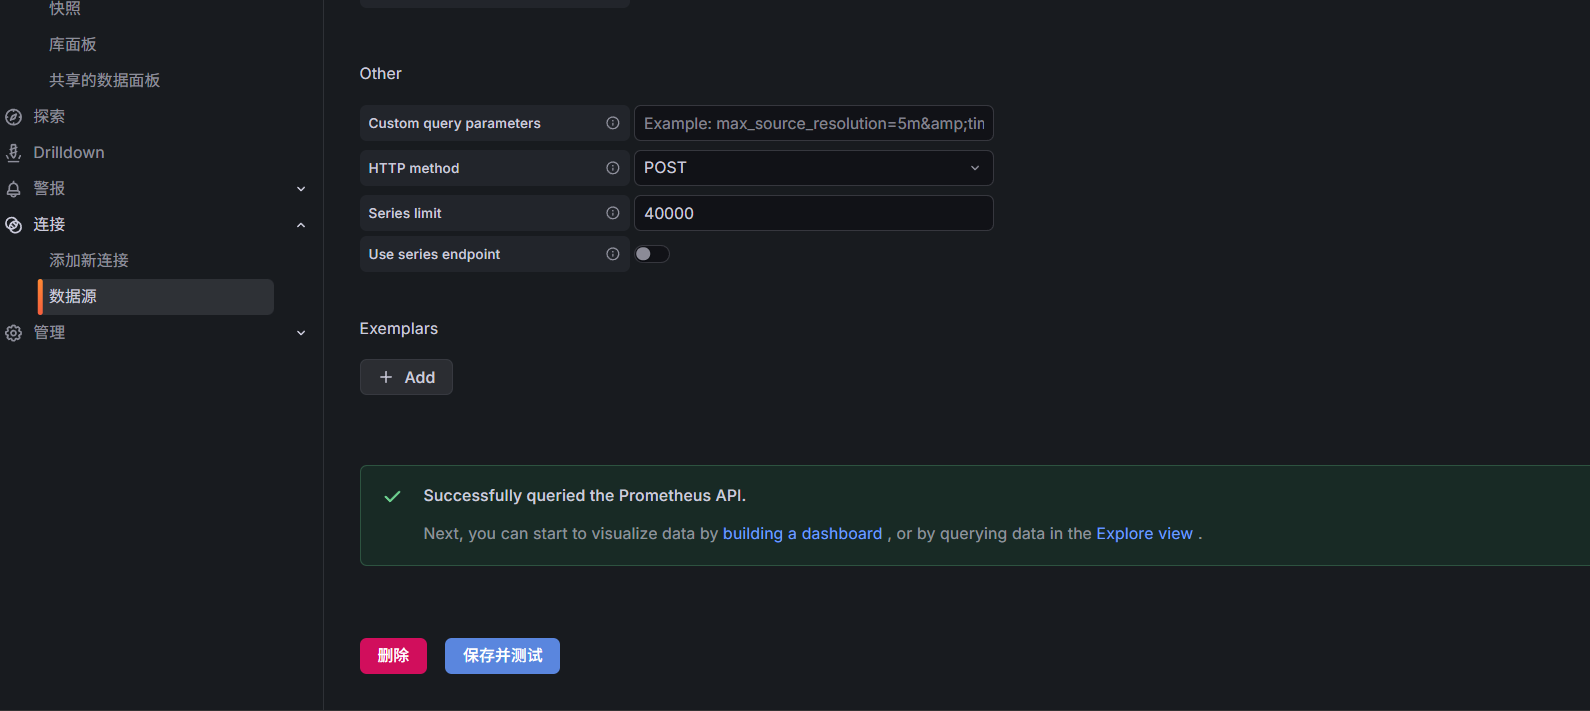
添加 Prometheus 数据源(http://localhost:9090)
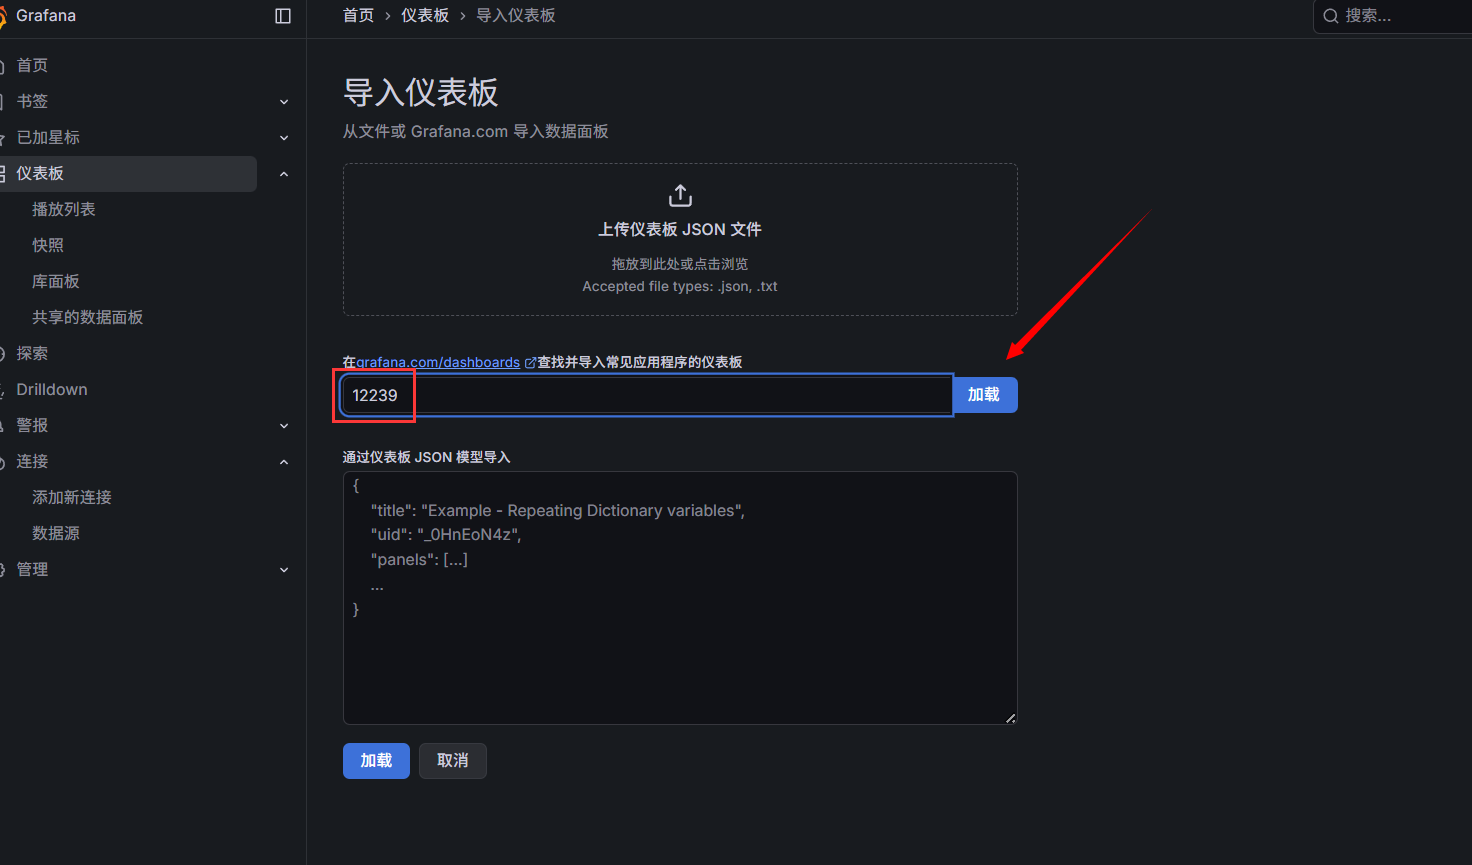
添加监控模板:node-exporter: 1860 dcgm-exporter: 12239
输入模板序号
关联数据源
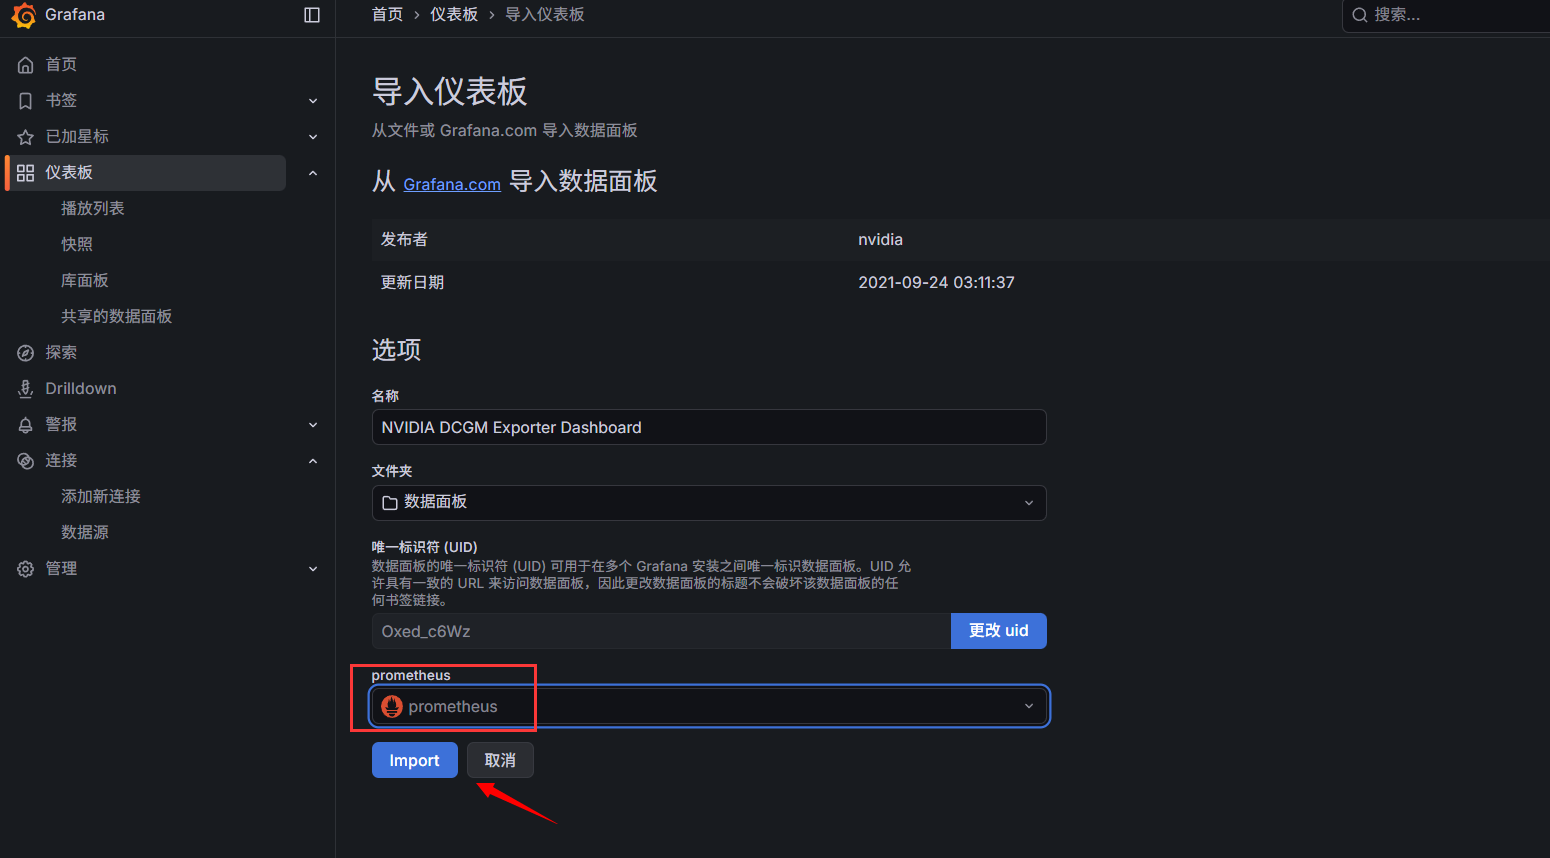
添加成功(node-exporter也是相同操作)

8. 安装 Prometheus-dingtalk 插件
展开代码# 1. 下载查看
sudo wget https://github.com/timonwong/prometheus-webhook-dingtalk/releases/download/v2.1.0/prometheus-webhook-dingtalk-2.1.0.linux-amd64.tar.gz
# 解压插件安装包
tar xf prometheus-webhook-dingtalk-2.1.0.linux-amd64.tar.gz
# 迁移目录至标准路径
sudo mv prometheus-webhook-dingtalk-2.1.0.linux-amd64 /opt/dingtalk
rm prometheus-webhook-dingtalk-2.1.0.linux-amd64.tar.gz
钉钉机器人创建与配置
安全设置需要勾选“加签”,记录“加密密钥”
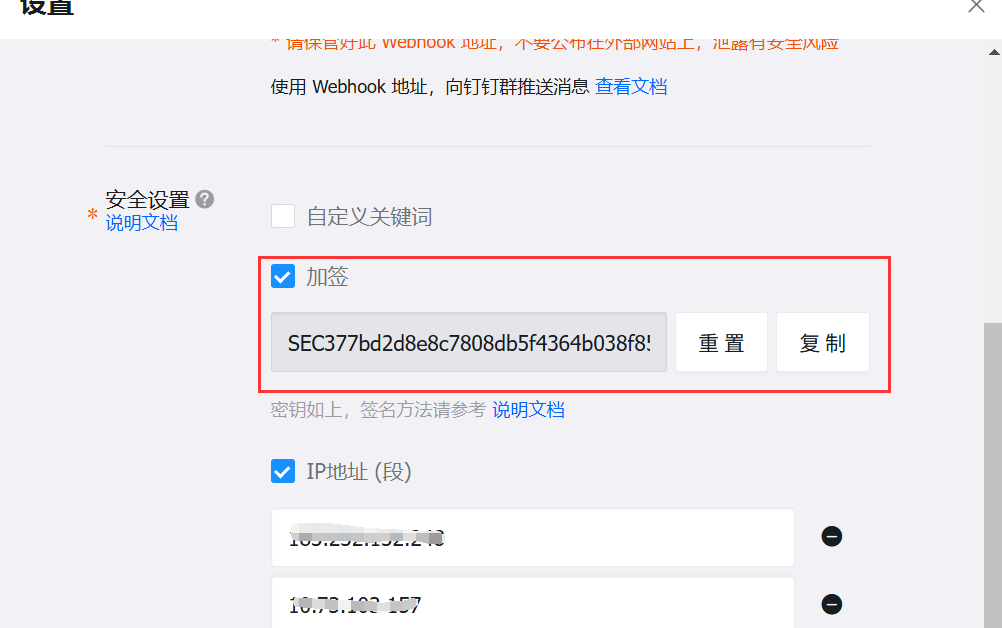
最后记录“Webhook”地址
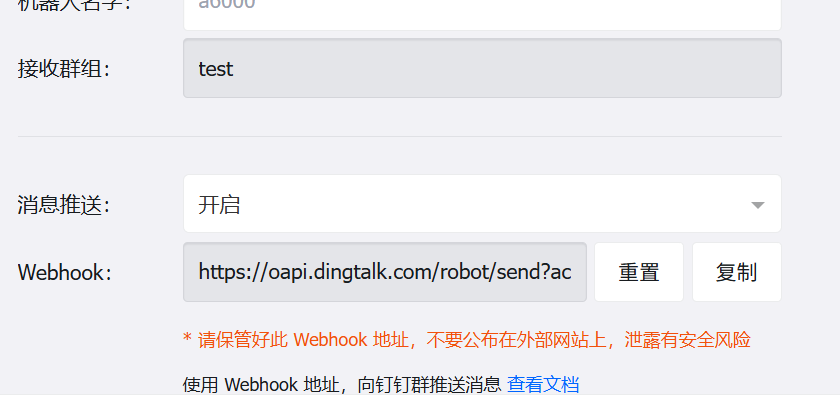
展开代码# 3. 修改插件配置文件
# 进入钉钉插件目录
cd /opt/dingtalk
# 配置消息模板
sudo mv ./contrib/templates/legacy/template.tmpl ./contrib/templates/legacy/template.tmpl.bak2
sudo tee ./contrib/templates/legacy/template.tmpl << 'EOF'
{{ define "__subject" }}
[{{ .Status | toUpper }}{{ if eq .Status "firing" }}:{{ .Alerts.Firing | len }}{{ end }}]
{{ end }}


{{ define "__alert_list" }}{{ range . }}
---
{{ if .Labels.owner }}@{{ .Labels.owner }}{{ end }}

**告警主题**: {{ .Annotations.summary }}

**告警类型**: {{ .Labels.alertname }}

**告警级别**: {{ .Labels.severity }}

**告警主机**: {{ .Labels.instance }}

**告警信息**: {{ index .Annotations "description" }}

**告警时间**: {{ dateInZone "2006.01.02 15:04:05" (.StartsAt) "Asia/Shanghai" }}
{{ end }}{{ end }}

{{ define "__resolved_list" }}{{ range . }}
---
{{ if .Labels.owner }}@{{ .Labels.owner }}{{ end }}

**告警主题**: {{ .Annotations.summary }}

**告警类型**: {{ .Labels.alertname }}

**告警级别**: {{ .Labels.severity }}

**告警主机**: {{ .Labels.instance }}

**告警信息**: {{ index .Annotations "description" }}

**告警时间**: {{ dateInZone "2006.01.02 15:04:05" (.StartsAt) "Asia/Shanghai" }}

**恢复时间**: {{ dateInZone "2006.01.02 15:04:05" (.EndsAt) "Asia/Shanghai" }}
{{ end }}{{ end }}


{{ define "default.title" }}
{{ template "__subject" . }}
{{ end }}

{{ define "default.content" }}
{{ if gt (len .Alerts.Firing) 0 }}
**====侦测到{{ .Alerts.Firing | len  }}个故障====**
{{ template "__alert_list" .Alerts.Firing }}
---
{{ end }}

{{ if gt (len .Alerts.Resolved) 0 }}
**====恢复{{ .Alerts.Resolved | len  }}个故障====**
{{ template "__resolved_list" .Alerts.Resolved }}
{{ end }}
{{ end }}


{{ define "ding.link.title" }}{{ template "default.title" . }}{{ end }}
{{ define "ding.link.content" }}{{ template "default.content" . }}{{ end }}
{{ define "legacy.title" }}{{ template "default.title" . }}{{ end }}
{{ define "legacy.content" }}{{ template "default.content" . }}{{ end }}
{{ template "default.title" . }}
{{ template "default.content" . }}
EOF

# 复制默认配置文件(避免直接修改原文件)
sudo cp -p config.example.yml config.yml
# 编辑配置文件
sudo nano config.yml
##### 修改以下内容,其余默认
timeout: 5s  # 插件请求超时时间
# 告警模板路径(使用插件自带的legacy模板)
templates:
  - contrib/templates/legacy/template.tmpl
# 告警目标(对应钉钉机器人)
targets:
webhook1:  # 自定义目标名称(后续Alertmanager配置需用到)
url: <Webhook地址>  # 钉钉机器人Webhook
  secret: <加签密钥>  # 钉钉机器人加签密钥
#####

# 4. 启动插件
# 进入插件目录
cd /opt/dingtalk
# 封装为 systemd 服务(默认端口为8060)
sudo tee /etc/systemd/system/dingtalk.service <<'EOF'
[Unit]
Description=prometheus-webhook-dingtalk
After=network.target
[Service]
Type=simple
WorkingDirectory=/opt/dingtalk
ExecStart=/opt/dingtalk/prometheus-webhook-dingtalk --config.file=/opt/dingtalk/config.yml
Restart=on-failure
[Install]
WantedBy=multi-user.target
EOF
# 重新加载服务并设置开机自启
sudo systemctl daemon-reload
sudo systemctl enable --now dingtalk
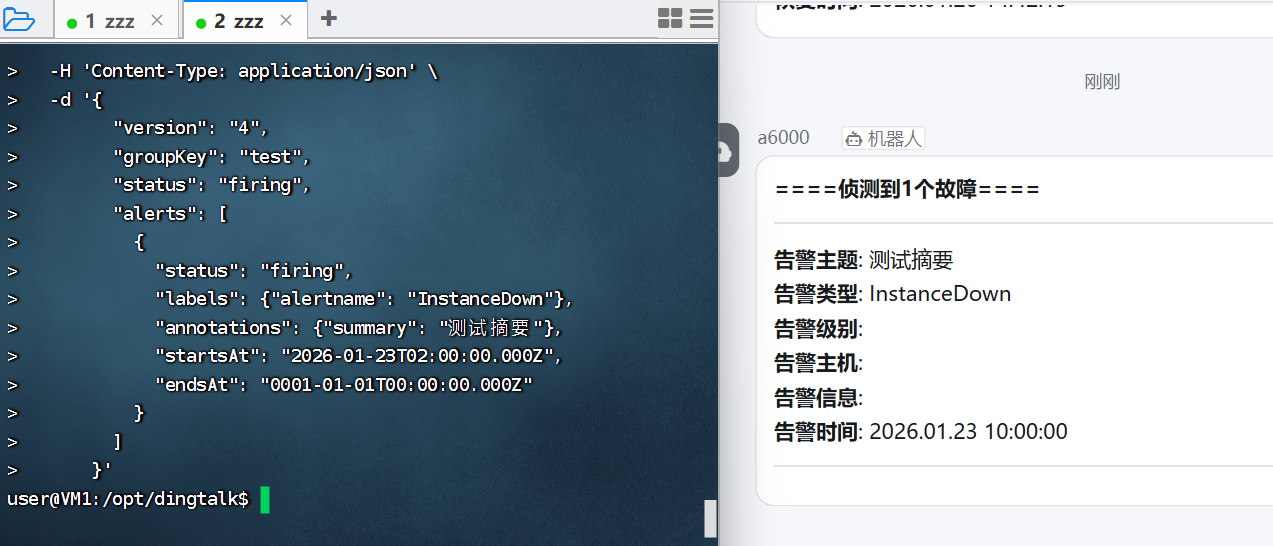
验证
展开代码# 测试文本
curl -X POST http://127.0.0.1:8060/dingtalk/webhook1/send \
  -H 'Content-Type: application/json' \
  -d '{
        "version": "4",
        "groupKey": "test",
        "status": "firing",
        "alerts": [
          {
            "status": "firing",
            "labels": {"alertname": "InstanceDown"},
            "annotations": {"summary": "测试摘要"},
            "startsAt": "2026-01-23T02:00:00.000Z",
            "endsAt": "0001-01-01T00:00:00.000Z"
          }
        ]
      }'
# 返回 OKuser 同时钉钉群出现告警信息,则为成功
9. 邮箱设置授权码
略
10. 部署 alertmanager 告警
展开代码# 1. 下载解压
AM_VER=0.30.1
wget -q https://github.com/prometheus/alertmanager/releases/download/v${AM_VER}/alertmanager-${AM_VER}.linux-amd64.tar.gz
tar -xzf alertmanager-${AM_VER}.linux-amd64.tar.gz
sudo mv alertmanager-${AM_VER}.linux-amd64 /opt/alertmanager
rm -f alertmanager-*.tar.gz

# 2. 一次性生成主配置(钉钉和邮箱分级管理)
sudo tee /opt/alertmanager/alertmanager.yml <<'EOF'
global:
  resolve_timeout: 5m
  smtp_smarthost: 'smtp.163.com:465'
  smtp_from: '13728024976@163.com'
  smtp_auth_username: '13728024976@163.com'
  smtp_auth_password: 'EZZeuE2aL6zkRvem'
  smtp_require_tls: false

route:
  group_by: ['alertname']
  group_wait: 10s
  group_interval: 5m
  repeat_interval: 20m
  receiver: 'mail'          # 默认:非核心告警发邮件
  routes:
    # 1. 核心业务告警(critical)→ 钉钉
    - match_re:
        severity: 'critical|warning'
      receiver: 'dingtalk_core'
    # 2. 非核心告警(warning|info)→ 邮件
    - match_re:
        severity: 'warning|info'
      receiver: 'mail'

receivers:
  - name: 'mail'
    email_configs:
      - to: '13728024976@163.com'
        send_resolved: true

  - name: 'dingtalk_core'
    webhook_configs:
      - url: 'http://127.0.0.1:8060/dingtalk/webhook1/send'
        send_resolved: true
EOF

# 3. systemd 启动
sudo tee /etc/systemd/system/alertmanager.service <<'EOF'
[Unit]
Description=Alertmanager
After=network.target
[Service]
User=root
ExecStart=/opt/alertmanager/alertmanager \
          --config.file=/opt/alertmanager/alertmanager.yml \
          --storage.path=/opt/alertmanager/data
Restart=always
[Install]
WantedBy=multi-user.target
EOF
# 重新加载服务并设置开机自启
sudo systemctl daemon-reload
sudo systemctl enable --now alertmanager
# 验证
浏览器访问http://<监控服务器>:9093
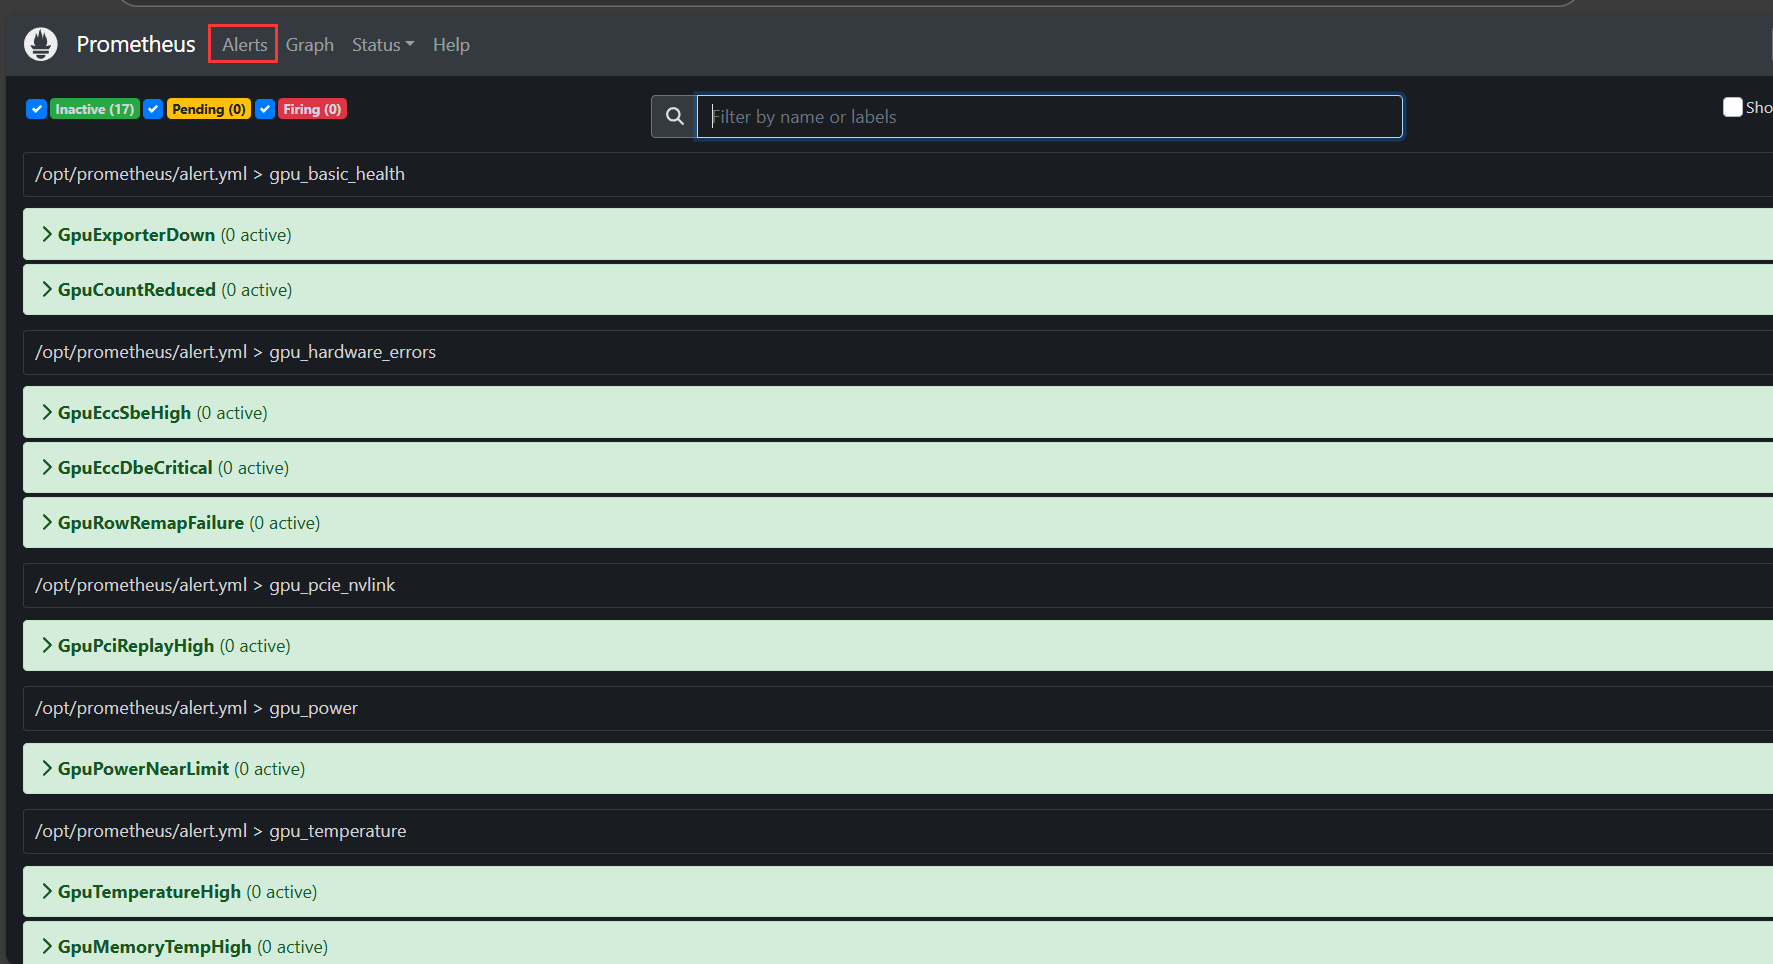
展开代码# 告警通道 在 /opt/prometheus/sd-cfg.yml 最后增加
alerting:
  alertmanagers:
    - static_configs:
        - targets: ['<监控服务器IP>:9093']

# 告警模板
sudo tee /opt/prometheus/alert.yml << 'EOF'
# 具体内容查看 alert.yml 文件
EOF
# 在 /opt/prometheus/prometheus.yml 最后增加
rule_files:
  - "alert.yml"

# 重启服务
sudo systemctl restart prometheus
附录
alert.yml文件
展开代码groups:
  # ============================================
  # 组 1:GPU 基础存活与状态
  # ============================================
  - name: gpu_basic_health
    rules:
      # GPU 实例下线(DCGM-Exporter 本身挂掉或 GPU 不可见)
      - alert: GpuExporterDown
        expr: up{sd_job="dcgm_exporter"} == 0
        for: 1m
        labels:
          severity: critical
        annotations:
          summary: "DCGM Exporter Down"
          description: "DCGM exporter on {{ $labels.instance }} has been down for more than 1 minute"

      # 相比1h前,机器出现掉卡
      - alert: GpuCountReduced
        expr: count by (instance) (DCGM_FI_DEV_GPU_UTIL) < on(instance) (count by (instance) (DCGM_FI_DEV_GPU_UTIL offset 1h))
        for: 5m
        labels:
          severity: critical
        annotations:
          summary: "实例 {{ $labels.instance }} GPU 数量减少"
          description: "当前剩余 {{ $value }} 张"

  # ============================================
  # 组 2:GPU 温度与散热
  # ============================================
  - name: gpu_temperature
    rules:
      # GPU 核心温度过高
      - alert: GpuTemperatureHigh
        expr: DCGM_FI_DEV_GPU_TEMP > 80
        for: 2m
        labels:
          severity: critical
        annotations:
          summary: "GPU Temperature High"
          description: "GPU {{ $labels.gpu }} on {{ $labels.instance }} temperature is {{ $value }}°C"

      # GPU 显存温度过高(A6000 独立显存温度传感器)
      - alert: GpuMemoryTempHigh
        expr: DCGM_FI_DEV_MEMORY_TEMP > 95
        for: 2m
        labels:
          severity: warning
        annotations:
          summary: "GPU Memory Temperature High"
          description: "GPU {{ $labels.gpu }} memory temperature is {{ $value }}°C"

  # ============================================
  # 组 3:GPU 利用率与性能
  # ============================================
  - name: gpu_utilization
    rules:
      # GPU 核心利用率高
      - alert: HighGpuUtilization
        expr: DCGM_FI_DEV_GPU_UTIL > 90
        for: 5m
        labels:
          severity: info
        annotations:
          summary: "GPU {{ $labels.gpu }} 利用率过高"
          description: "实例 {{ $labels.instance }} GPU{{ $labels.gpu }} 利用率 {{ $value }}% 已持续 5 分钟"

      # GPU 显存利用率高
      - alert: GpuMemoryUsageHigh
        expr: DCGM_FI_DEV_FB_USED / 49152 > 0.85
        for: 5m
        labels:
          severity: info
        annotations:
          summary: "High GPU Memory Usage"
          description: "GPU {{ $labels.gpu }} memory usage is {{ $value | humanizePercentage }}"

      # 显存带宽利用率高
      - alert: GpuMemBandwidthHigh
        expr: DCGM_FI_DEV_MEM_COPY_UTIL > 90
        for: 5m
        labels:
          severity: warning
        annotations:
          summary: "High GPU Memory Bandwidth Usage"
          description: "实例 {{ $labels.instance }} GPU{{ $labels.gpu }} 显存带宽利用率 {{ $value }}% 已持续 5 分钟"

  # ============================================
  # 组 4:GPU 功耗与电源
  # ============================================
  - name: gpu_power
    rules:
      # 功耗接近 TDP 限制(A6000 TDP 300W)
      - alert: GpuPowerNearLimit
        expr: DCGM_FI_DEV_POWER_USAGE / 300 > 0.95
        for: 3m
        labels:
          severity: warning
        annotations:
          summary: "GPU Power Near Limit"
          description: "GPU {{ $labels.gpu }} power usage is {{ $value | humanizePercentage }}W, near 300W TDP"

  # ============================================
  # 组 5:GPU 硬件错误与 ECC
  # ============================================
  - name: gpu_hardware_errors
    rules:

      # 单比特 ECC 错误(显存老化预警)
      - alert: GpuEccSbeHigh
        expr: rate(DCGM_FI_DEV_ECC_SBE_VOL_TOTAL[1h]) > 0
        for: 0m
        labels:
          severity: warning
        annotations:
          summary: "GPU ECC Single-Bit Errors Increasing"
          description: "GPU {{ $labels.gpu }} has increasing SBE errors, monitor for degradation"

      # 双比特 ECC 错误(立即更换显卡)
      - alert: GpuEccDbeCritical
        expr: DCGM_FI_DEV_ECC_DBE_VOL_TOTAL > 0
        for: 0m
        labels:
          severity: critical
        annotations:
          summary: "GPU ECC Double-Bit Error"
          description: "GPU {{ $labels.gpu }} has {{ $value }} DBE errors, replace GPU immediately"

      # 显存行重映射失败(显存物理损坏)
      - alert: GpuRowRemapFailure
        expr: DCGM_FI_DEV_ROW_REMAP_FAILURE > 0
        for: 0m
        labels:
          severity: critical
        annotations:
          summary: "GPU Row Remap Failure"
          description: "GPU {{ $labels.gpu }} row remap failed, unrecoverable memory error"

  # ============================================
  # 组 6:PCIe 与互联
  # ============================================
  - name: gpu_pcie_nvlink
    rules:
      # PCIe 重传次数高(信号质量差或降速)
      - alert: GpuPciReplayHigh
        expr: rate(DCGM_FI_DEV_PCIE_REPLAY_COUNTER[5m]) > 10
        for: 5m
        labels:
          severity: warning
        annotations:
          summary: "High PCIe Replay Count"
          description: "GPU {{ $labels.gpu }} PCIe replay rate is {{ $value }}/s, check riser/cable"

  # ============================================
  # 组 7:Node-Exporter 系统级关联
  # ============================================
  - name: node_gpu_correlation
    rules:
      # 系统 OOM(可能导致 GPU 显存交换失败)
      - alert: NodeOomKill
        expr: increase(node_vmstat_oom_kill[5m]) > 0
        for: 0m
        labels:
          severity: critical
        annotations:
          summary: "System OOM Kill Detected"
          description: "Instance {{ $labels.instance }} has OOM kills, GPU workloads may be affected"

      # CPU Steal 时间高(虚拟机 GPU 直通场景)
      - alert: NodeCpuStealHigh
        expr: rate(node_cpu_seconds_total{mode="steal"}[5m]) > 0.1
        for: 5m
        labels:
          severity: warning
        annotations:
          summary: "High CPU Steal Time"
          description: "Instance {{ $labels.instance }} CPU steal is {{ $value | humanizePercentage }}, VM hypervisor contention"

      # 系统内存压力(影响 GPU 显存映射)
      - alert: NodeMemoryPressure
        expr: node_memory_MemAvailable_bytes / node_memory_MemTotal_bytes < 0.05
        for: 2m
        labels:
          severity: warning
        annotations:
          summary: "System Memory Pressure"
          description: "Instance {{ $labels.instance }} available memory is {{ $value | humanizePercentage }}"

      # 节点负载高(GPU 任务调度延迟)
      - alert: NodeLoadHigh
        expr: node_load1 / count(node_cpu_seconds_total{mode="idle"}) without (cpu,mode) > 2
        for: 5m
        labels:
          severity: info
        annotations:
          summary: "Node Load High"
          description: "Instance {{ $labels.instance }} load average is {{ $value }}x CPU count"

      # 磁盘空间不足(日志/模型存储)
      - alert: NodeDiskFull
        expr: node_filesystem_avail_bytes{mountpoint="/"} / node_filesystem_size_bytes{mountpoint="/"} < 0.1
        for: 5m
        labels:
          severity: warning
        annotations:
          summary: "Root Disk Almost Full"
          description: "Instance {{ $labels.instance }} root disk is {{ $value | humanizePercentage }} full"
单台机器 shell 脚本部署被监听端
展开代码#!/bin/bash
set -e

[[ $EUID -eq 0 ]] || { echo "请用 sudo 执行"; exit 1; }

echo "===== 1. 关闭防火墙 ====="
sudo ufw disable

echo "===== 2. 装DCGM ====="
wget https://developer.download.nvidia.com/compute/cuda/repos/ubuntu2204/x86_64/cuda-keyring_1.0-1_all.deb
sudo dpkg -i cuda-keyring_1.0-1_all.deb
sudo add-apt-repository "deb https://developer.download.nvidia.com/compute/cuda/repos/ubuntu2204/x86_64/ /"
sudo apt-get update -y
sudo apt-get install -y datacenter-gpu-manager
# 安装 DCGM-4 库、服务与推荐包(一次搞定 libdcgm.so.4 和 systemd 单元)
sudo apt install -y --install-recommends datacenter-gpu-manager-4-cuda12
sudo systemctl start nvidia-dcgm && sudo systemctl enable nvidia-dcgm
rm cuda-keyring_1.0-1_all.deb

echo "===== 3. 装 Node Exporter(系统指标) ====="
wget -q http://10.73.103.162:26000/node_exporter-1.7.0.linux-amd64.tar.gz
tar -xzf node_exporter-1.7.0.linux-amd64.tar.gz
sudo mv node_exporter-1.7.0.linux-amd64/node_exporter /usr/local/bin/
rm -rf node_exporter-1.7.0*
# 设置访问限制
sudo mkdir /opt/node_exporter
cd /opt/node_exporter
sudo tee ./cfg.yml << 'EOF'
basic_auth_users:
  prometheus: $2y$10$2RXQihYDv4o7Gku5yYyDaubsHKDKUEg2VeG2eUVqvoQbB2AKgDtHO
EOF
# 起 systemd 服务
sudo tee /etc/systemd/system/node_exporter.service <<'EOF'
[Unit]
Description=Node Exporter
After=network.target
[Service]
User=root
ExecStart=/usr/local/bin/node_exporter \
          --web.listen-address=:59100 \
          --collector.cpu --collector.meminfo --collector.diskstats \
          --collector.filesystem --collector.systemd \
          --web.config.file /opt/node_exporter/cfg.yml
Restart=always
[Install]
WantedBy=multi-user.target
EOF
# 重新加载服务并设置开机自启
sudo systemctl daemon-reload
sudo systemctl enable --now node_exporter

echo "===== 4. 装 go 工具 ====="
cd ~
wget http://10.73.103.162:26000/go1.24.0.linux-amd64.tar.gz
sudo tar -C /usr/local -xzf go1.24.0.linux-amd64.tar.gz
echo 'export PATH=/usr/local/go/bin:$PATH' | sudo tee /etc/profile.d/go.sh
source /etc/profile.d/go.sh
rm go1.24.0.linux-amd64.tar.gz
# 验证
go version

echo "===== 5. 装 DCGM Exporter(GPU 指标) ====="
wget http://10.73.103.162:26000/dcgm-exporter-4.4.2-4.7.1.tar.gz
tar -xzf dcgm-exporter-4.4.2-4.7.1.tar.gz
cd dcgm-exporter-4.4.2-4.7.1
sed -i 's/^go 1.24.0/go 1.20/' go.mod
sed -i '/^toolchain/d' go.mod
# 设置国内代理
go env -w GOPROXY=https://goproxy.cn,direct
# 禁止 go 自动去下新版 toolchain
go env -w GOTOOLCHAIN=local
go mod tidy
make binary
# 给 sudo 继承当前 PATH,并一次性把国内代理带过去
sudo env "PATH=$PATH" \
     GOPROXY=https://goproxy.cn,direct \
     make install
# 设置访问限制
sudo mkdir /opt/dcgm-exporter
sudo tee /opt/dcgm-exporter/cfg.yml << 'EOF'
basic_auth_users:
  prometheus: $2y$10$2RXQihYDv4o7Gku5yYyDaubsHKDKUEg2VeG2eUVqvoQbB2AKgDtHO
EOF
# 起 systemd 服务
sudo tee /etc/systemd/system/dcgm-exporter.service <<'EOF'
[Unit]
Description=DCGM Exporter
After=nvidia-dcgm.service
Wants=nvidia-dcgm.service

[Service]
User=root
ExecStart=/usr/bin/dcgm-exporter \
          -a ":59400" \
          --web-config-file /opt/dcgm-exporter/cfg.yml
Restart=always
RestartSec=5

[Install]
WantedBy=multi-user.target
EOF
# 重新加载服务并设置开机自启
sudo systemctl daemon-reload
sudo systemctl enable --now dcgm-exporter
echo "===== 6. 验证 ====="
curl -u prometheus:prometheus http://127.0.0.1:59400/metrics | head
多台机器ansible批量配置被监听端
链接
参考:
12.Alertmanager告警配置文件和告警规则详解 - 马俊南 - 博客园
GPU监控2.0指标详解含DCGM与自定义指标-容器服务 Kubernetes 版 ACK-阿里云
Prometheus(四)—— Alertmanager完整部署指南:邮件+钉钉告警全流程落地 - 实践 - yangykaifa - 博客园
Prometheus 的报警机制:Alertmanager 的配置与使用-阿里云开发者社区
ubuntu22.04安装dcgm和基本用法 - 苏老的学习笔记
Prometheus01 Prometheus基础, 部署与配置, Node Exporter, Pushgateway, PromQL 运算 - 战斗小人 - 博客园
本文作者:zzz
本文链接:
版权声明:本博客所有文章除特别声明外,均采用 BY-NC-SA 许可协议。转载请注明出处!
目录