windows删除并创建恢复分区
请注意,本文编写于 54 天前,最后修改于 5 天前,其中某些信息可能已经过时。
目录
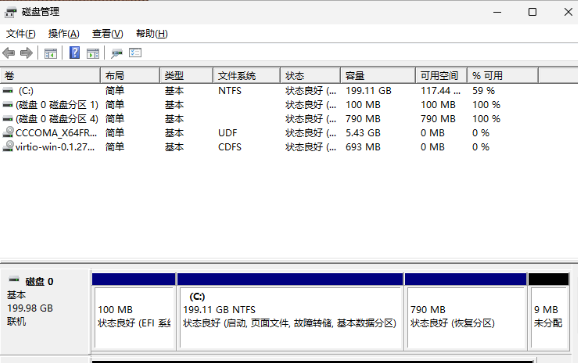
恢复分区
一、删除恢复分区
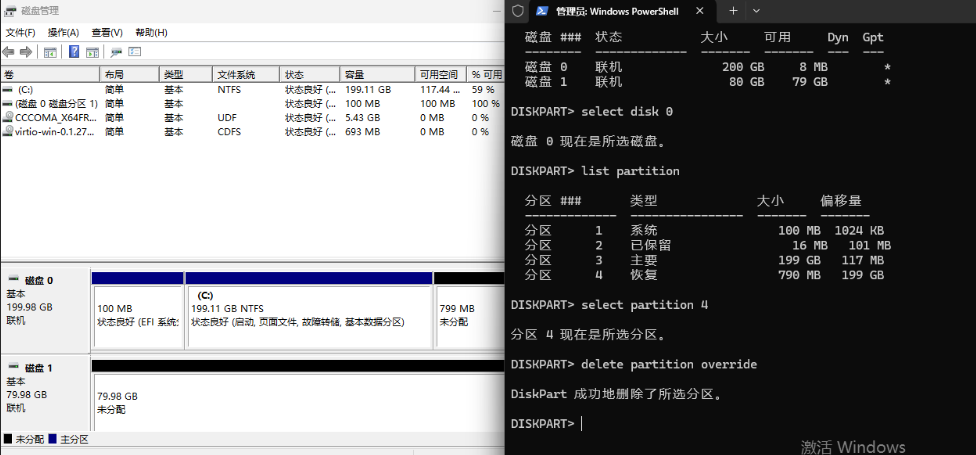
1. 以管理员权限打开【windows终端】
2. 运行 DiskPart 工具
展开代码diskpart
3. 列出当前磁盘
展开代码list disk
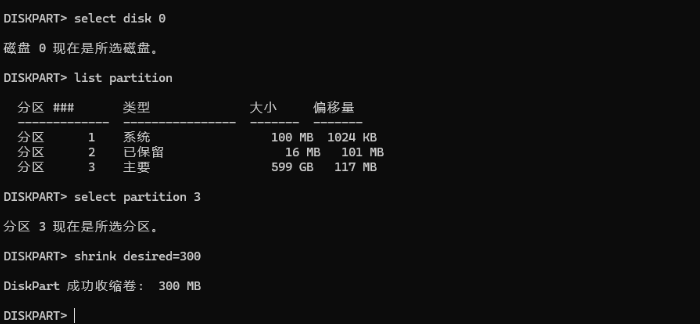
4. 选择包含【恢复分区】的磁盘
展开代码select disk 0
5. 查看磁盘分区信息
展开代码list partition
6. 选择【恢复分区】
展开代码select partition X
7. 删除【恢复分区】
展开代码delete partition override
二、收缩系统分区大小
1. 选择操作系统分区
展开代码select partition Y
2. 收缩系统分区:收缩大小 = 1024 - 当前未分配大小
展开代码shrink desired=320
三、创建恢复分区
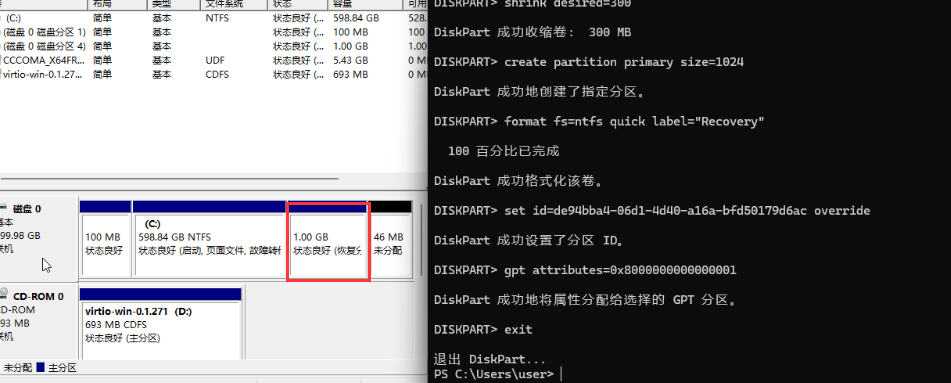
1. 创建新的【恢复分区】
展开代码create partition primary size=1024
2. 格式化新分区为 NTFS
展开代码format fs=ntfs quick label="Recovery"
3. 注册分区为新的【恢复分区】
展开代码set id=de94bba4-06d1-4d40-a16a-bfd50179d6ac override
4. 锁定分区以防止误修改
展开代码get attributes=0x000000000000001
注:8和1之间共14个零
5. 退出 Diskpart 工具
展开代码exit
四、提取 winre.wim 恢复文件
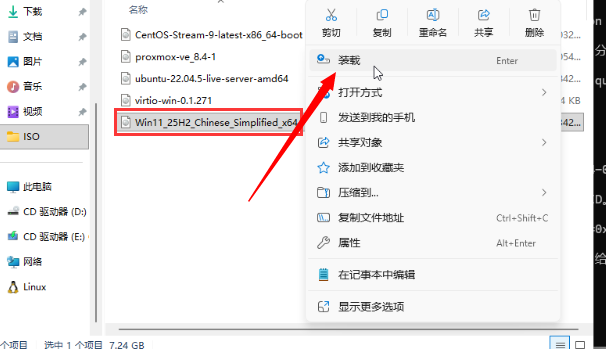
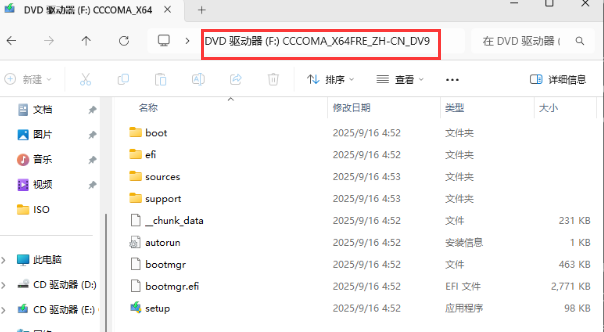
1. 挂载 Windows 11 ISO 文件,并记住所在盘符
2. 创建临时文件夹
展开代码mkdir "%USERPROFILE%\Downloads\Images" "%USERPROFILE%\Downloads\Mount"
3. 复制安装文件
展开代码xcopy "F:\Sources\install.wim" "%USERPROFILE%\Downloads\Images\" /H /E /C /I /Y
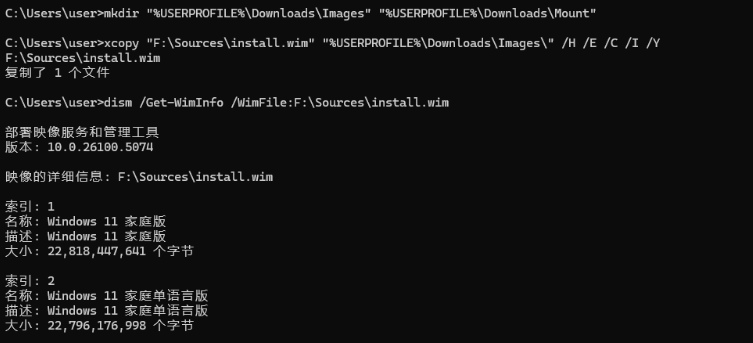
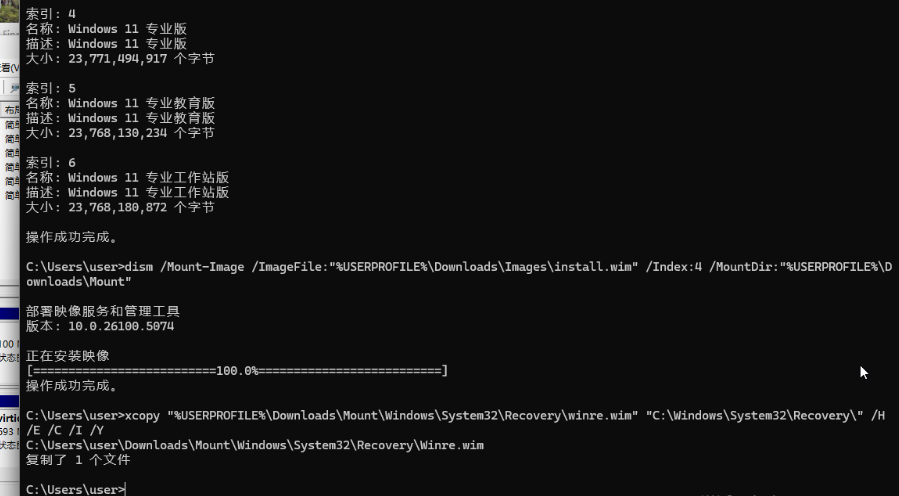
4. 确认映像对应的索引号
展开代码dism /Get-WimInfo /WimFile:F:\Sources\install.wim
5. 挂载 Install.wim镜像,推荐专业版
展开代码dism /Mount-Image /ImageFile:"%USERPROFILE%\Downloads\Images\install.wim" /Index:4 /MountDir:"%USERPROFILE%\Downloads\Mount"
6. 拷贝 wimre.wim 恢复文件
展开代码xcopy "%USERPROFILE%\Downloads\Mount\Windows\System32\Recovery\winre.wim" "C:\Windows\System32\Recovery\" /H /E /C /I /Y
五、启用恢复环境
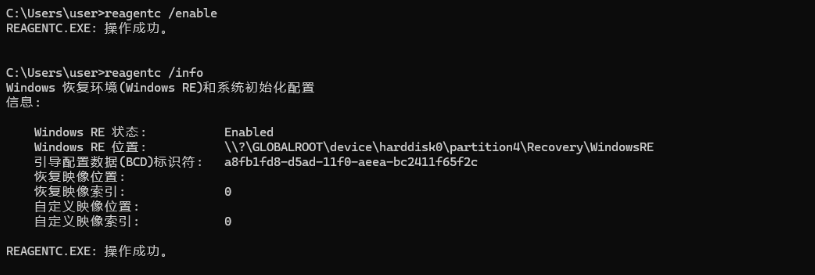
1. 启用 WinRE
展开代码reagentc /enable
2. 验证恢复环境状态
展开代码reagentc /info
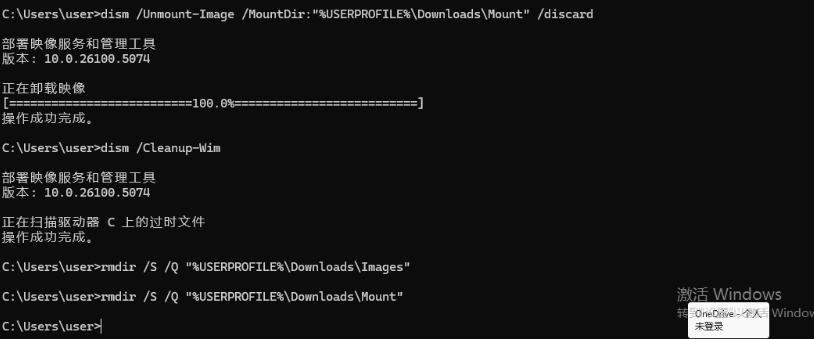
3. 卸载映像并清理
展开代码dism /Unmount-Image /MountDir:"%USERPROFILE%\Downloads\Mount" /discard
dism /Cleanup-Wim
4. 删除临时文件夹
展开代码rmdir /S /Q "%USERPROFILE%\Downloads\Images"
rmdir /S /Q "%USERPROFILE%\Downloads\Mount"
六、验证
完成以上所有步骤后,Windows 11 的「恢复分区」就已经重建成功。你可以通过以下步骤测试是否正常可用:
1. 按Windows + I快捷键打开「设置」,依次选择「系统」>「恢复」。
2. 点击「高级启动」旁边的「立即重新启动」按钮。如果系统加载到恢复界面,则说明「恢复分区」配置成功

本文作者:zzz
本文链接:
版权声明:本博客所有文章除特别声明外,均采用 BY-NC-SA 许可协议。转载请注明出处!
目录